Embroidery Placement Guide⁚ A Comprehensive Guide to Perfect Positioning
Embroidery placement is the art of positioning a design on a garment to achieve the desired aesthetic and functional outcome. Several factors influence this, including the garment type, design size, and intended purpose. For instance, placing a design too high or too low on a garment can disrupt its visual appeal and functionality.
Introduction
Embroidery, with its intricate designs and captivating textures, elevates garments and accessories to a whole new level of artistry. But beyond the aesthetic appeal, achieving perfect embroidery placement is paramount for a truly professional and pleasing outcome. A well-placed embroidery design not only enhances the visual appeal but also ensures it complements the garment’s silhouette and intended functionality.
This comprehensive guide delves into the intricacies of embroidery placement, offering a step-by-step journey to mastering this essential skill. From understanding the fundamental principles to exploring essential tools and techniques, we’ll equip you with the knowledge and confidence to create flawlessly positioned embroidery on any project. Whether you’re a seasoned embroiderer or a curious beginner, this guide will serve as your trusted companion in achieving embroidery placement that’s both precise and aesthetically pleasing.

Understanding Embroidery Placement
Embroidery placement is more than just haphazardly positioning a design on a garment. It’s a thoughtful process that involves considering the garment’s style, the design’s size and shape, and the intended purpose of the embroidery. The placement should enhance the garment’s overall design, making it visually appealing and functional. For example, a large, intricate design might be best suited for the back of a jacket, while a small, delicate design might be more appropriate for the chest of a t-shirt.
There are several factors that come into play when determining the optimal placement for your embroidery design. These include the garment type, the design’s size and shape, the intended purpose of the embroidery, and the desired visual effect. By carefully considering these factors, you can ensure your embroidery is not only aesthetically pleasing but also complements the garment’s style and functionality.
Factors Influencing Placement
Several factors influence the placement of your embroidery design, ensuring a visually appealing and functional outcome. The garment type is crucial, as different styles call for different design placement. For instance, a polo shirt might require a design on the left chest, while a T-shirt might accommodate a design on the left chest or the back. The design’s size and shape also play a significant role, as a large, intricate design might be best suited for the back of a jacket, while a small, delicate design might be more appropriate for the chest of a t-shirt.
The intended purpose of the embroidery also influences placement. If the design is meant to be a brand logo, it might be placed on the front of a shirt or a hat. On the other hand, if the design is meant to be a decorative element, it might be placed on the back of a jacket or the sleeve of a shirt. Finally, the desired visual effect also influences placement. For example, a design placed high on a garment might create a more formal look, while a design placed low on a garment might create a more casual look.
Essential Tools for Accurate Placement
Achieving perfect embroidery placement requires a few essential tools that help you measure, mark, and align your designs with precision. A simple ruler or measuring tape is a must-have for accurately determining the placement of your design on the garment. For those who frequently embroider, a dedicated embroidery placement ruler or a set of templates can be a valuable investment. These tools provide pre-determined placement guidelines for common garment types like T-shirts, polo shirts, and hats.
Marking tools like fabric pencils, chalk pencils, or disappearing ink pens are essential for marking the exact placement of your design on the fabric. These tools allow you to temporarily mark the fabric without leaving permanent stains. Consider using a hoop mat or a non-slip hooping surface to ensure your hoop stays securely in place during the hooping process. These mats provide a stable base and prevent your hoop from sliding or moving while you’re working.
Standard Placement Guidelines
While embroidery placement is ultimately a matter of personal preference, there are standard guidelines that provide a good starting point for achieving balanced and visually appealing results. These guidelines consider factors such as the garment type, the size and shape of the design, and the intended use of the embroidered item. For T-shirts, the standard placement for a logo or design is typically 7-9 inches down from the left shoulder seam, centered between the placket and side seam.
Polo shirts often feature embroidery on the left chest, with the design placed 7-9 inches down from the left shoulder seam, centered between the placket and side seam. For button-down shirts, the standard placement for embroidery is typically on the left chest, 3-5 inches from the center of the shirt. Robes, on the other hand, often feature embroidery on the left chest, 4-6 inches to the right of the placket.
T-shirts
T-shirts offer a versatile canvas for embroidery, allowing for a range of design placements depending on the desired effect. The standard placement for a logo or design on a T-shirt is typically 7-9 inches down from the left shoulder seam, centered between the placket and side seam. This placement ensures the design is visible and balanced without being too high or too low on the garment.
For a more casual look, the design can be placed slightly lower, around 3-5 inches from the center of the shirt. This position works well for smaller designs or for designs that are meant to be more subtle. When placing embroidery on a T-shirt, it’s essential to consider the size and shape of the design, as well as the overall look and feel of the garment.
Polo Shirts
Polo shirts, with their classic collar and button placket, present unique considerations for embroidery placement. The standard placement for a logo or design on a polo shirt is typically 7-9 inches down from the left shoulder seam, centered between the placket and side seam. This placement ensures the design is visible and balanced, without being too close to the collar or the button placket.
For a more casual look, the design can be placed slightly lower, around 3-5 inches from the center of the shirt. This position works well for smaller designs or for designs that are meant to be more subtle. Alternatively, the design can be placed on the right side of the chest, about 4-6 inches to the right of the placket. This placement is often used for smaller designs or for designs that are meant to be more understated. When placing embroidery on a polo shirt, it’s essential to consider the size and shape of the design, as well as the overall look and feel of the garment.
Button-Down Shirts
Button-down shirts, with their crisp collars and tailored fit, offer a more formal canvas for embroidery. The ideal placement for a logo or design on a button-down shirt is typically 17 inches down from the neck edge, centered between the side seams. This placement creates a balanced and professional look, ensuring the design is visible but not overpowering. It’s also important to avoid placing embroidery too close to the collar or the button placket, as this can disrupt the flow of the shirt.
For a more subtle approach, consider placing the design on the left side of the chest, about 3-5 inches from the center. This position is well-suited for smaller designs or for designs that are meant to be more understated. When embroidering on a button-down shirt, it’s crucial to consider the fabric weight and weave, as this can impact the final result. A heavier fabric may require a more robust embroidery technique to ensure the design is securely attached.
Robes
Robes, with their flowing silhouettes and luxurious feel, provide a unique canvas for embroidery. The placement of a design on a robe should be considered carefully to enhance its overall aesthetic and practicality. A common approach is to center the design on the back of the robe, about 5-6 inches below the collar. This position ensures the design is visible without overshadowing the robe’s overall design. For a more personalized touch, consider embroidering initials or a monogram on the left chest area, approximately 7-9 inches down from the shoulder seam. This placement creates a subtle yet elegant accent that adds a touch of individuality to the robe.
When embroidering on robes, it’s important to choose a design that complements the robe’s style and fabric. For instance, a delicate floral motif might suit a silk robe, while a bold geometric design might work well on a heavier cotton robe. It’s also crucial to consider the fabric’s weight and texture, as this can affect the stitching and the overall appearance of the design.

Other Garments
Embroidery placement extends beyond the typical shirts and hats, opening up a world of possibilities for personalizing a diverse range of garments. For example, knitted hats and beanies require a unique approach. The embroidery should be placed 1 inch down from the bottom cuff and stitched inside out. This ensures a comfortable fit and prevents the embroidery from irritating the wearer’s skin. The logo should have a maximum width of 1.5 inches to maintain a balanced appearance on the hat. Turtlenecks, with their high collars, offer a distinct placement challenge. Logo embroidery is typically done between the left and center shoulder seam, positioned on the left side of the neck cuff. This placement is subtle yet eye-catching, adding a personalized touch without detracting from the turtleneck’s overall design.
Remember, when embroidering on any garment, consider the fabric’s weight, texture, and the overall design of the garment; These factors will guide your placement choices and ensure that your embroidery enhances the garment’s beauty and functionality.
Marking Your Fabric for Precision
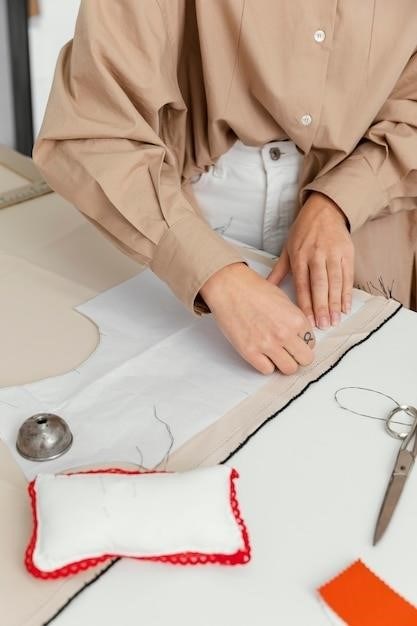
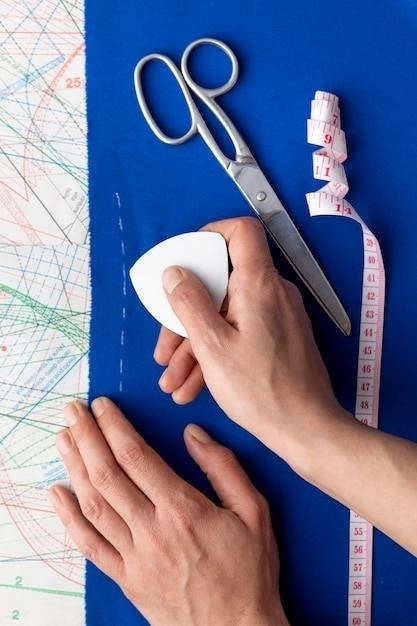
Accuracy is paramount in embroidery placement, and precise marking is your ally in achieving flawless results. While some prefer to rely on eyeballing, experts advocate for precise measurements and marking techniques. This ensures that your embroidery is positioned perfectly, adding a professional touch to your creations. A simple ruler or measuring tape can be your go-to tools for marking the design location, especially if you’re not using a specialized placement aid. Alternatively, you can utilize your plastic template, placing it over your blank and extending the grid lines at the center point with your preferred marking utensil. Then, connect these lines with a ruler for a clear and accurate marking.
If you need to center a design, remember that folding a blank like a t-shirt in half creates a crease at the center, making it easy to mark. And for those unsure about their design placement, printing a template is a valuable step. This allows you to visualize the final product before marking and embroidering, minimizing the risk of errors. Templates can be printed using almost any embroidery software, making this technique accessible to all.
Hooping Techniques for Perfect Alignment
Hooping your fabric correctly is a crucial step in achieving perfectly aligned embroidery. The goal is to ensure that the marked design center aligns with the marked center of the hoop’s embroidery area. Hooping techniques can vary, but the key is to minimize fabric movement during the process. For a smoother experience, consider adhering your stabilizer to your blank using a light layer of Odif 505, reducing the number of moving parts. As a beginner, taping your plastic template over the front of your blank can be helpful, guiding your hooping.
If you’re striving for perfect hooping, investing in a PAL (Perfect Alignment Laser) from dime is a worthwhile consideration; This tool is designed to center blanks in magnetic hoops and during floating. When floating fabric on top of stabilizer, mark the center of the embroidery area with a pencil beforehand. Then, fold your blank in half (if possible to isolate a single layer) and lay it along the corresponding straight line. Unfold the blank gently over the rest of the stabilizer and press it down.
Adjusting Design Placement on Your Machine
Even with careful hooping, it’s not always possible to achieve perfect alignment. Thankfully, modern embroidery machines offer features that allow you to adjust design placement after hooping. Most touch screen interfaces allow you to move the hoop around, making the needle line up with the center of your marked blank. Some high-end machines even automatically adjust the needle position for you.
For instance, on my Brother embroidery machine, you can press “Move” after loading the design and change the location of the design relative to the hoop area. Many machines also allow you to change the angle of the design, rotating it if your hooping was slightly off. So, if your hooping isn’t perfectly centered, don’t despair! Refer to your machine’s manual to learn how to center the embroidery hoop and adjust design placement. Always remember to remove paper and plastic templates before starting to embroider and ensure your design on the machine is oriented correctly.
Mastering how to center machine embroidery designs is a crucial step in achieving professional-looking results. By understanding the basics of design placement, using helpful tools and techniques, and utilizing your machine’s features, you can confidently create beautiful embroidered projects. Whether you’re embroidering t-shirts, towels, or other items, accurate placement will enhance the overall look and feel of your work. With practice and attention to detail, you’ll be able to create stunning embroidery that you’ll be proud to showcase.
Don’t be afraid to experiment and find what works best for you. Each project and design may require a slightly different approach, but with the knowledge and skills you’ve gained, you’ll be well-equipped to handle any embroidery placement challenge. Happy embroidering!
Frequently Asked Questions
Q⁚ What are some common embroidery placement standards for different garments?
A⁚ There are general guidelines for placement, but they can vary depending on the design size and the style of the garment. For example, on a polo shirt, a logo is typically placed 7-9 inches down from the left shoulder seam, centered between the placket and side seam. On a t-shirt, the placement is similar, but it can also be centered 3-5 inches from the center of the chest. Pockets are often embroidered 12 inches down from the top, centered between the side seams. You can find more detailed placement guides online or in embroidery software programs.
Q⁚ What if I don’t have a placement guide?
A⁚ You can use a ruler or measuring tape to mark the desired placement on your fabric. You can also use a template or a gridded hoop mat to help you center your design.
About the Author
Aly Marie is a passionate embroiderer with a wealth of experience in the craft. A mother of two girls and a part-time eye doctor, she’s been sewing for 20 years and embroidering for the past 8. Her love for fabrics extends to quilting and all things fabric cutting. Aly shares her knowledge and enthusiasm for embroidery through her blog, where she provides helpful tutorials and tips for fellow embroiderers. She believes in the power of creativity and encourages others to explore the world of embroidery, whether it’s for personal projects or for business ventures. Her dedication to sharing her expertise has earned her a loyal following among embroidery enthusiasts.

